

If you’re looking for a solution for sweaty hands during workouts or sports activities, you’ve come to the right place. Sweaty hands can be a major problem when it comes to gripping, especially when you need to hold onto weights, exercise equipment or sports gear, and can potentially lead to unsafe situations.
Before investing in grips for sweaty hands, there are a few factors to consider. Firstly, it’s important to decide which type of grip suits your needs. For example, there are grips specifically designed for weightlifting, golf, gymnastics, pole dancing and rock climbing. Secondly, make sure you understand what material the grip is made of, as some materials can irritate sensitive skin. Lastly, it’s important to read reviews and consider the price range. Investing in a well-reviewed and high-quality grip can make a big difference in the long run.
Do you struggle with sweaty hands while working out or playing sports? Are you tired of losing grip on equipment and feeling embarrassed in front of others? Look no further than grips for sweaty hands. With a range of options available, you’re sure to find something that fits your unique needs. Don’t let an easy fix hold you back from your best performance – find a solution today!
10 Best Grips For Sweaty Hands
| # | Product Image | Product Name | Product Notes | Check Price |
|---|---|---|---|---|
|
1
|
 |
The product is ideal for enhancing grip and keeping hands dry, particularly for those with sweaty hands.
|
|
|
|
2
|
 |
Ideal for gamers looking for durable, touchscreen-compatible gloves with a high-performance grip that are machine washable.
|
|
|
|
3
|
 |
The product is ideal for gamers seeking increased finger dexterity and grip, with the added bonus of being machine washable.
|
|
|
|
4
|
 |
Ideal for gamers or those requiring precision grip and moisture-wicking in half-finger gloves.
|
|
|
|
5
|
 |
It is ideal for athletes and individuals who need better grip and reduced sweat on their hands during physical activities.
|
|
|
|
6
|
 |
The product is ideal for pole dancers who need a strong grip and anti-slip aid to prevent sweating during performance.
|
|
|
|
7
|
 |
Enhancing grip and keeping hands dry for those with sweaty hands during physical activities.
|
|
|
|
8
|
 |
The product is ideal for improving hand grip on various sports equipment like tennis overgrips and pickleball paddles.
|
|
|
|
9
|
 |
The product is ideal for enhancing grip and preventing slippage during various physical activities, like sports, weightlifting, and gymnastics.
|
|
|
|
10
|
 |
Ideal for enhancing grip and reducing sweat on hands during sports, work or any activity requiring a strong hold.
|
|
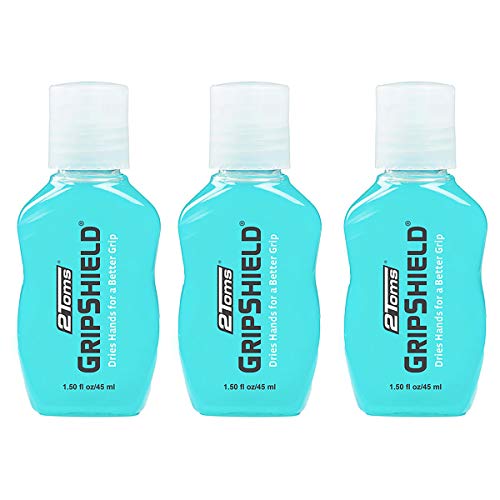
1. Ultra-Dry Grip Enhancer – 3-Pack
2Toms GripShield is the perfect solution for anyone who needs to improve their grip while ensuring their hands stay dry. This product creates a moisture barrier that dries your hands quickly and enhances your grip. It is suitable for use in any sport or activity where a firm, dry grip is essential. Whether you need to play golf, tennis, pole fitness, bowling, or shooting sports, 2Toms GripShield is the right choice for you.
This product provides a natural and comfortable grip for sweaty hands, giving you long-lasting results. It is easy to use and leaves no sticky or powdery residue, making it completely mess-free. Moreover, it is non-greasy, ensuring your hands remain sweat-free and dry.
One of the best things about 2Toms GripShield is that you only need to use a small amount to get the desired effect. Apply a dime or nickel-sized amount to your hands and rub it in. You can use it during any physical activity, especially during those hot and humid conditions.
2Toms GripShield is made in the U.S.A., ensuring that you get a high-quality product that meets all the necessary standards. So, if you want to improve your grip and performance while keeping your hands dry and comfortable, 2Toms GripShield is the right choice for you.
- Creates a moisture barrier that enhances your grip
- Provides a natural and comfortable grip for sweaty hands
- Leaves no sticky or powdery residue
- Non-greasy, ensuring your hands remain sweat-free and dry
- One small amount is all you need to get the desired effect
- Suitable for use in any sport or activity where a firm, dry grip is essential
- Made in the U.S.A., ensuring high quality and meeting necessary standards
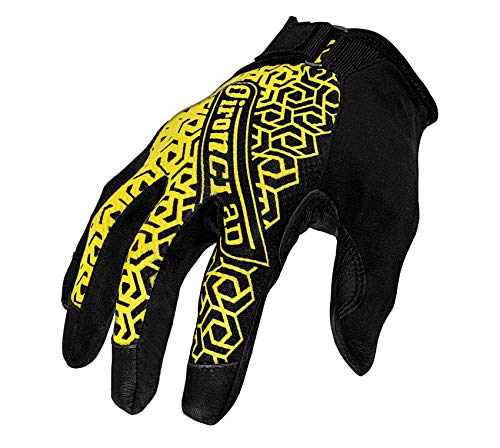
2. Ironclad Gaming Gloves: Precision Fit And Performance Grip
Experience the ultimate gaming performance with the Precision Fit & Fingertips gaming gloves. These gloves are designed to provide you with the confidence to button mash with precision, thanks to their perfect fit and fingertip design. The Performance Grip feature ensures that the controller stays secure in your hands, preventing slipping during gameplay. Additionally, the contoured palm pattern provides all-day comfort, so you can enjoy your favorite games for longer periods of time. The gloves are even touchscreen compatible, allowing you to share your achievements with the world without having to remove them. The breathable, moisture-wicking fabrics used in the construction of these gloves provide enhanced sweat management, ensuring that your hands remain cool and dry during intense gaming sessions. Get ready to take your gaming to the next level with the Precision Fit & Fingertips gaming gloves.
Looking for a way to enhance your gaming performance? Look no further than the Precision Fit & Fingertips gaming gloves. These gloves provide a perfect fit and feature a specialized fingertip design that allows for precise button mashing. The Performance Grip keeps the controller securely in your hands, preventing slipping and ensuring that you stay in control of the game. The contoured palm pattern provides all-day comfort, while the touchscreen compatibility allows you to share your triumphs with the world. The breathable, moisture-wicking fabrics used in the construction of these gloves keep your hands cool and dry, even during extended gaming sessions. Get ready to take your gaming to the next level with the Precision Fit & Fingertips gaming gloves.
Gaming just got better with the Precision Fit & Fingertips gaming gloves. These gloves provide a perfect fit and feature a specialized fingertip design that allows for precise button mashing. The Performance Grip keeps the controller securely in your hands, preventing slipping and ensuring that you stay in control of the game. The contoured palm pattern provides all-day comfort, while the touchscreen compatibility allows you to share your triumphs with the world. The breathable, moisture-wicking fabrics used in the construction of these gloves keep your hands cool and dry, even during extended gaming sessions. Experience the ultimate gaming performance with the Precision Fit & Fingertips gaming gloves.
- Provides a perfect fit and specialized fingertip design for precise button mashing
- Performance Grip keeps the controller securely in your hands
- Contoured palm pattern provides all-day comfort
- Touchscreen compatibility allows for easy sharing of achievements
- Breathable, moisture-wicking fabrics keep hands cool and dry
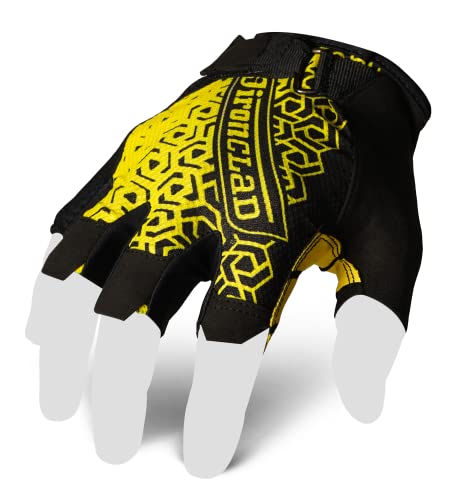
3. Ironclad Precision Gaming Gloves – Xs Size
Experience faster and more precise mouse movements with the Low-Friction Ceramic Slider that reduces drag. The mouse is kept secure in your hand with the Performance Silicone Grip Palm. Comfort is ensured during long sessions with the Keyboard Hand Wrist Padding. Breathable and moisture-wicking fabrics deliver enhanced sweat management to keep your hands dry. You can enjoy maximum dexterity with the half finger coverage.
If you are looking for a mouse pad that can enhance your gaming experience, then this product is for you. The Low-Friction Ceramic Slider helps to reduce the drag between the mouse and the pad, allowing for more precise movements. The Performance Silicone Grip Palm helps to keep the mouse secure in your hand even during intense gaming sessions. The Keyboard Hand Wrist Padding provides excellent comfort, reducing hand fatigue when typing or gaming for long periods. The breathable and moisture-wicking fabrics ensure that your hands remain dry even during intense gaming sessions. The half finger coverage provides maximum dexterity, allowing you to make quick and precise movements.
This mouse pad is perfect for gamers who want to take their gaming experience to the next level. The Low-Friction Ceramic Slider reduces drag, allowing for faster and more precise movements. The Performance Silicone Grip Palm ensures that the mouse stays secure in your hand, even during intense gaming sessions. The Keyboard Hand Wrist Padding provides excellent comfort, reducing hand fatigue when typing or gaming for long periods. The breathable and moisture-wicking fabrics keep your hands dry and comfortable, even during intense gaming sessions. The half finger coverage provides maximum dexterity, allowing you to make quick and precise movements with ease.
- Low-Friction Ceramic Slider reduces drag for faster and more precise mouse movements
- Performance Silicone Grip Palm keeps the mouse secure in your hand
- Keyboard Hand Wrist Padding provides comfort during long sessions
- Breathable and moisture-wicking fabrics deliver enhanced sweat management
- Half finger coverage provides maximum dexterity
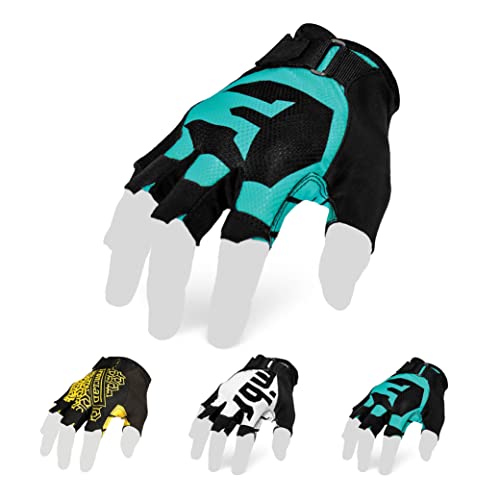
4. Ironclad Gaming Gloves: Ultimate Spot-On Control.
The Performance Silicone Grip Palm is a feature that ensures the gaming controller stays secure in the user's hand. This is particularly important for gamers who experience sweaty palms during gameplay. The grip provides a firm hold on the controller and minimizes the risk of the controller slipping from the hand.
The Half Finger Coverage design is another great feature of this gaming accessory. It allows for maximum dexterity and flexibility, making it easier for gamers to control the buttons and joysticks on the controller. This feature is particularly useful for gamers who require quick and precise movements during gameplay.
The Microfiber Sweat Wipe is an added convenience that helps to keep the hands dry and comfortable during gameplay. The sweat wipe is made of microfiber material and is located on the back of the thumb. This feature is particularly useful for gamers who experience sweaty palms during gameplay.
The Breathable, Moisture Wicking Fabrics used in making this gaming accessory ensure that the hands remain dry and comfortable during gameplay. This is particularly important for gamers who spend long hours playing games. The fabrics are also durable and can withstand regular use without losing their quality.
The Ergonomic Cuff is another great feature of this gaming accessory. It provides a comfortable fit and ensures that the accessory stays in place during gameplay. The cuff is designed to fit snugly around the wrist, without being too tight or restrictive.
- Provides a secure grip on the gaming controller
- Allows for maximum dexterity and flexibility
- Keeps the hands dry and comfortable during gameplay
- Durable fabrics that can withstand regular use
- Ergonomic cuff for a comfortable fit
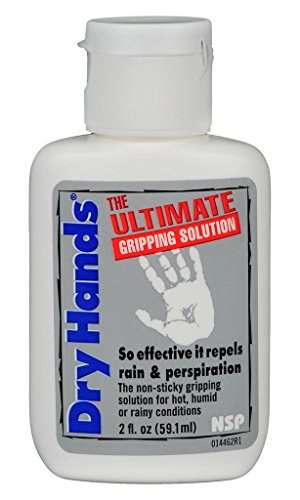
5. Dry Hands "the Ultimate Gripping Solution" All-Sport Topical Lotion- 2 Ounce
The product is designed to alleviate grip problems that are caused by perspiration or rain. It effectively repels water to keep your hands dry without leaving behind any sticky or greasy residue. The product is perfect for use in hot, humid, rainy, or damp conditions. It gives you the confidence of a glove while retaining the natural touch of your bare hand. The product is made with high-quality materials and is designed to provide long-lasting protection and comfort.
The product is easy to apply and can be used by anyone. It is perfect for athletes, sports enthusiasts, and people who work outdoors. It can be used on a variety of surfaces, including metal, wood, and plastic. It is also safe to use on skin and will not cause any irritation or discomfort.
The product is a must-have for anyone who wants to improve their grip and performance in wet or humid conditions. It is perfect for golfers, tennis players, weightlifters, and anyone who wants to improve their grip and control. It is also great for people who work outdoors, such as construction workers, landscapers, and farmers. The product is highly recommended and is a great investment for anyone who wants to improve their performance in wet or humid conditions.
- Repels water effectively to keep your hands dry
- Leaves no sticky or greasy residue
- Provides protection in hot, humid, rainy or damp conditions
- Improves grip and performance in wet or humid conditions
- Easy to apply and can be used on a variety of surfaces
- Safe to use on skin and will not cause any irritation or discomfort
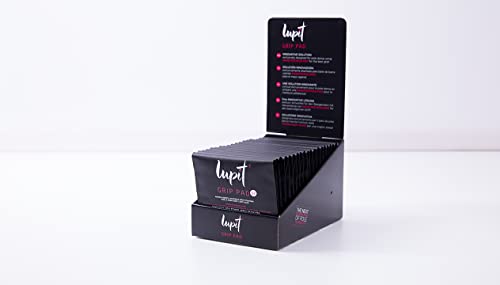
6. Lupit Pole Grip Aid: The Ultimate Pole Companion.
Looking for an eco-friendly grip product that is also skin-friendly? Look no further than this product! The team behind this product spent almost a year researching and testing to ensure that they were doing their part for the environment. Through their research, they discovered that they could create a thinner blanket using recyclable PET material that would still carry the same amount of grip products. This thinner blanket is not only eco-friendly, but skin-friendly as well. It retains the shape of the pillow and provides a more controllable dosage of the grip product for the user. By simply popping the pad and tapping on preferred skin areas, the user can apply the product with ease. And, to ensure that the product is top-quality, it has been tested at Institut Fresenius under DAkkS – the national accreditation body of the Federal Republic of Germany. This product is IPSF approved, meaning that it meets the highest standards of quality and safety.
- Eco-friendly and skin-friendly
- Thinner blanket with recyclable PET material
- Retains the shape of the pillow
- More controllable dosage of grip product
- Tested at Institut Fresenius under DAkkS
- IPSF approved
7. 2toms Gripshield, Liquid Chalk Grip Enhancer For Sweaty Hands, Keeps Hands Dry, 1.5 Ounce, 2 Bottles
2Toms GripShield is a moisture barrier that quickly dries hands and enhances grip. It is perfect for any sport or activity that requires a firm, dry grip. This product is designed to provide a natural and comfortable grip for sweaty hands, resulting in long-lasting effects. It is commonly used for golf, tennis, gaming, pole fitness, bowling, gymnastics, mechanics and industrial work, shooting sports, and more.
GripShield does not leave behind any sticky or powdery residue, making it completely mess-free. It is also non-greasy, ensuring that your hands remain dry and sweat-free. Before use, shake the bottle well. With GripShield, a little goes a long way. Simply apply a dime or nickel-sized amount to your hands and rub it in. Use it during any physical activity, especially during hot and humid conditions.
This product is made in the USA with high-quality ingredients to ensure maximum effectiveness and safety.
- Creates a moisture barrier that quickly dries hands and enhances grip
- Provides a natural and comfortable grip for sweaty hands
- Leaves behind no sticky or powdery residue and is non-greasy
- A little goes a long way
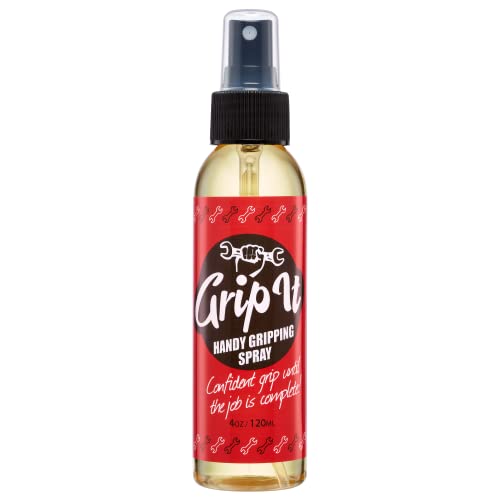
8. Grip-It: The Ultimate Hand Grip Solution
Grip-iT is a versatile grip aid that can be used for various sports and activities such as tennis, pole fitness, aerial yoga, video gaming, and pickleball. It helps in maintaining a firm grip without having to replace the racket grips or grip tapes every season. The product can be easily applied to hands or overgrips to enhance grip and control.
For Tennis players, Grip-iT provides better tennis racket grip that enhances their performance during matches and practice. It eliminates the need to change grips frequently, as it offers long-lasting grip and comfort. With Grip-iT, tennis players can focus on their game without worrying about their racket slipping from their hands.
For Pole Fitness enthusiasts, Grip-iT is the ultimate pole grip aid that offers a better grip and control while performing pole dancing routines. The product can be easily sprayed onto the hands and rubbed thoroughly to achieve better pole fitness grip. Grip-iT is a must-have accessory for all pole dancers.
For Aerial Yoga practitioners, Grip-iT provides a firm grip while allowing the hands to sweat naturally. Unlike other hand grip aids, Grip-iT offers a natural grip that enhances the aerial yoga experience. The product can be easily applied to hands and used with aerial yoga swings or hammocks.
For Video Gamers, Grip-iT is a must-have accessory that provides better gamer grip. It eliminates the issue of sweaty hands during long gaming hours and enhances the gripping ability. The product can be easily applied to hands for better grip and control.
For Pickleball players, Grip-iT provides a better grip for their pickleball racket. The product can be easily sprayed onto hands and pickleball overgrips for supercharging the pickleball racket grip. Grip-iT eliminates the need to replace the overgrips frequently and offers long-lasting grip and comfort.
- Long-lasting grip and comfort
- Enhances grip and control
- Easy to apply
- Versatile and can be used for various sports and activities
- Offers natural grip
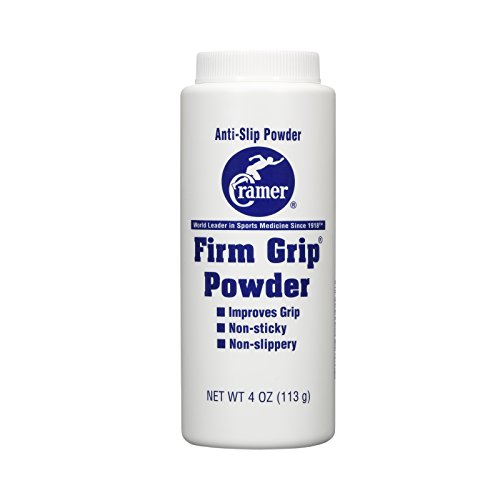
9. Cramer Firm Grip: Ultimate Sweat Control Solution
The Rosin based formula of this portable powder is designed to improve grip during sweaty activities without the need for pore-blocking antiperspirant ingredients. The 4-ounce plastic shaker is easy to carry around and use whenever needed. The Wood Rosin based formula not only improves grip when sweaty but also prevents the overly-sticky feeling that is common with other grip enhancing products.
This portable solution is perfect for a variety of activities including football, golf, tennis, racquetball, squash, table tennis, gymnastics, weight lifting, and other indoor or outdoor activities. It is also highly recommended as an accessory for pole fitness and aerial silks, providing excellent grip on the apparatus. Moreover, it can also hold clothing and bikini bottoms in place during pageants and bodybuilding competitions.
One of the best things about this Rosin based powder is its ability to provide traction on outdoor tools in hot weather. It helps to prevent slipping and sliding while working with tools, making it an essential item for anyone who works in the outdoors.
Overall, this portable Rosin based powder is a highly effective grip enhancing solution that is perfect for a wide range of activities. It is easy to use, highly portable, and provides a non-sticky grip that is perfect for sweaty activities. Whether you are an athlete, a gym enthusiast, or someone who works outdoors, this powder is an excellent investment that will help you improve your grip and performance.
- Provides a non-sticky grip that is perfect for sweaty activities
- Easy to carry around and use whenever needed
- Prevents slipping and sliding while working with tools in hot weather
- Perfect for a wide range of activities including sports, gym, and outdoor work
- Holds clothing and bikini bottoms in place during pageants and bodybuilding competitions
- – May not be suitable for individuals with sensitive skin
10. Tite Grip Ii All-Sport Topical Antiperspirant Hand Lotion/non-Slip Grip Enhancement
Say goodbye to sweaty and sticky hands with this amazing topical hand cream. It is specially formulated to keep your hands dry and sweat-free for up to 4-6 hours. This cream effectively draws moisture from your hands, so you won't have to worry about any sticky residue. You can even wear gloves with it for a non-slip grip. Whether you're in humid conditions or just need dry hands, this cream is your solution. It leaves no chalky residue and can be used in any situation where dry hands are needed.
Experience the ultimate comfort and convenience with this topical hand cream. It is perfect for anyone who needs dry hands for work or play. This cream will keep your hands dry and comfortable all day long. It is easy to apply and absorbs quickly, leaving no mess or residue behind. You can use it anytime, anywhere, for a quick and effective solution to sweaty hands. Don't let sweat ruin your day, try this hand cream today and feel the difference.
- Keeps hands dry and sweat-free for up to 4-6 hours
- No sticky residue
- Can be used while wearing gloves for a non-slip grip
- Leaves no chalky residue
- Suitable for use in any situation where dry hands are needed
- – May not be suitable for those with sensitive skin
Best Grips For Sweaty Hands FAQs
Are there any specific brands that offer grips that are ideal for people with sweaty hands?
Yes, there are several brands that offer grips that are ideal for people with sweaty hands. One of the most popular brands is Golf Pride, which has a variety of grips designed to provide excellent traction and control in wet conditions. Their Tour Velvet and MCC Plus4 grips are particularly popular among golfers with sweaty hands. Another brand that offers grips for sweaty hands is Winn, which has a range of grips made from materials that wick away moisture and provide a comfortable, non-slip grip. Their Dri-Tac grips are especially popular among golfers who struggle with sweaty hands. Additionally, Lamkin offers grips with a proprietary material called ACE that is designed to provide superior traction and control in all weather conditions, including wet conditions. Overall, there are many options available for golfers with sweaty hands, and it's a good idea to try out a few different brands and styles to find the one that works best for you.
Can using chalk or gloves help with sweaty hands when using grips?
Yes, using chalk or gloves can definitely help with sweaty hands when using grips. Sweaty hands can greatly affect your grip strength and can cause you to lose control of the equipment you're using. Chalk is a popular choice among athletes, weightlifters and climbers as it helps absorb moisture and improve friction between the hands and the equipment. It also helps improve your grip strength and prevent the buildup of calluses. Gloves, on the other hand, provide a barrier between your sweaty hands and the equipment, preventing slippage and improving grip. However, it's important to choose gloves that are specifically designed for the activity you're doing as some gloves can be too thick or bulky, affecting your dexterity and grip. In summary, both chalk and gloves are effective solutions to sweaty hands when using grips, and the one you choose will depend on your personal preference and the activity you're doing.
How do I choose the right size of grips for my sweaty hands?
Choosing the right size of grips for your sweaty hands is an important consideration. If the grips are too small, they can slip out of your hands, and if they are too big, you may have trouble holding onto them. The first thing you should do is measure your hands to determine the appropriate size of grip. To do this, place a ruler at the base of your palm and measure to the tip of your longest finger. This measurement will give you an idea of the size of grip you need. You should also consider the type of activity you will be doing. For example, if you will be doing gymnastics, you may want a smaller grip for better control, but if you are weightlifting, you may want a larger grip for added support. Additionally, you may want to consider the material of the grip. Some materials, such as rubber, can be more effective in preventing slippage than others. Ultimately, choosing the right size of grip for your sweaty hands is a personal preference, and you may need to try out different sizes and materials to find the one that works best for you.
How do I properly clean and maintain grips for sweaty hands to prevent them from getting slippery?
Keeping your grips clean and sweat-free is essential for a safe and comfortable workout. Here are some tips to help you clean and maintain your grips for sweaty hands:
1. Clean your grips regularly: Wipe down your grips with a damp cloth after each workout to remove any sweat, dirt, or oil that may have accumulated on them.
2. Use grip cleaner: Invest in a good quality grip cleaner that is specifically designed to remove sweat and grime from your grips. Apply the cleaner to a soft cloth and wipe down your grips thoroughly.
3. Use chalk: Chalk can help absorb excess sweat from your hands and improve your grip. However, make sure to use it sparingly, as too much chalk can make your grips slippery.
4. Store your grips properly: Make sure to store your grips in a cool, dry place to prevent them from getting damp or moldy.
5. Replace your grips when necessary: If your grips are starting to show signs of wear and tear, it's time to replace them. Old, worn-out grips can be slippery and dangerous to use.
By following these simple tips, you can keep your grips clean, dry, and slip-free, ensuring a safe and comfortable workout every time.
What are the best materials for grips that are suitable for sweaty hands?
When it comes to choosing the best materials for grips that are suitable for sweaty hands, you need to consider a few factors. First, the material should have excellent moisture-wicking properties to prevent your hands from slipping during use. Second, it should be durable and able to withstand wear and tear over time.
One of the best materials for grips that are suitable for sweaty hands is rubber. Rubber grips are known for their excellent non-slip properties, making them ideal for use in sweaty environments. They are also durable and can be easily cleaned and maintained.
Another excellent material for grips is neoprene. This synthetic material is known for its excellent moisture-wicking properties, making it perfect for use in sweaty environments. Neoprene grips are also soft and comfortable to use, making them ideal for long periods of use.
Finally, leather grips can also be an excellent choice for sweaty hands. While not as moisture-wicking as rubber or neoprene, leather grips are durable and offer excellent grip and traction, making them suitable for use in sweaty environments.
In conclusion, when choosing the best materials for grips that are suitable for sweaty hands, it's important to consider a few factors such as moisture-wicking properties, durability, and comfort. Rubber, neoprene, and leather are all excellent choices that can provide the necessary grip and traction needed for sweaty hands.